Creating a DIY mirror wall can be an affordable and visually striking way to transform your home. The process involves careful planning, selecting the right mirrors, and using easy-to-follow installation steps. By customizing the layout and choosing appropriate materials, you can design a mirror wall that reflects your personal style while brightening up the space.
Content
Why Choose a DIY Mirror Wall?
A DIY mirror wall adds a unique touch to any room. Mirrors have the ability to reflect light, making a small space appear larger and brighter. Whether you opt for a minimalist design or a more intricate geometric pattern, a mirror wall can instantly elevate the ambiance of your living room, hallway, or bedroom. Not only does it enhance the aesthetic appeal of your home, but it also offers a fun and creative DIY project to work on.
The best part is that you can tailor the mirror wall to fit your specific design preferences and budget. With just a few materials and some creativity, you can craft a personalized decor feature that can transform a dull wall into a stunning focal point.
Planning Your DIY Mirror Wall
Before diving into the project, it’s essential to carefully plan the layout and materials for your DIY mirror wall. Here’s how to get started:
Choosing the Right Space for Your Mirror Wall
The first step is selecting the ideal wall for your mirror installation. Large mirror wall ideas work best in rooms where space can be accentuated, such as living rooms, bedrooms, or hallways. Mirrors can visually expand small spaces, so ensure the wall you choose can handle the reflections created by multiple mirrors.
Consider the flow of light in the room and how the mirrors will interact with it. Position your mirror wall where it can reflect natural light or highlight other features in the room.
Measuring Your Wall
To avoid any miscalculations, it’s important to accurately measure the wall space before purchasing your mirrors. Use a measuring tape to determine the dimensions of the area, and consider how much space you’d like between each mirror. Planning ahead ensures that you select the right amount and size of mirrors to fit your mirror wall layout.
Selecting Mirrors for Your Project
The next step in your DIY mirror wall journey is selecting the right mirrors. Opt for mirrors of different shapes and sizes to create a dynamic and modern look. Mix and match mirror sizes and styles for a more eclectic design. For a contemporary feel, geometric mirrors or round mirrors can be arranged in a stylish pattern. Alternatively, using rectangular mirrors will give the space a sleek and clean look.
If you’re looking for something more customizable, consider custom mirror wall designs where mirrors are cut to fit a specific shape or pattern.
Materials Needed for a DIY Mirror Wall
Creating a DIY mirror wall requires specific materials. Here’s what you will need:
- Mirrors: Depending on your design, you can use pre-framed mirrors or mirror tiles.
- Adhesive or Mounting Tape: Ensure you use strong mirror wall adhesive or double-sided mounting tape to hold the mirrors in place.
- Measuring Tape: For precise measurements.
- Level: To ensure that each mirror is aligned correctly.
- Pencil: To mark where each mirror will be placed.
- Cleaning Cloth: To clean mirrors before installation.
These materials are readily available at most hardware or home improvement stores, and the total cost should be relatively affordable. If you’re on a tight budget, budget-friendly DIY mirror wall options include purchasing second-hand mirrors or using mirror tiles instead of large, expensive mirrors.
Step-by-Step Guide to Installing Your DIY Mirror Wall
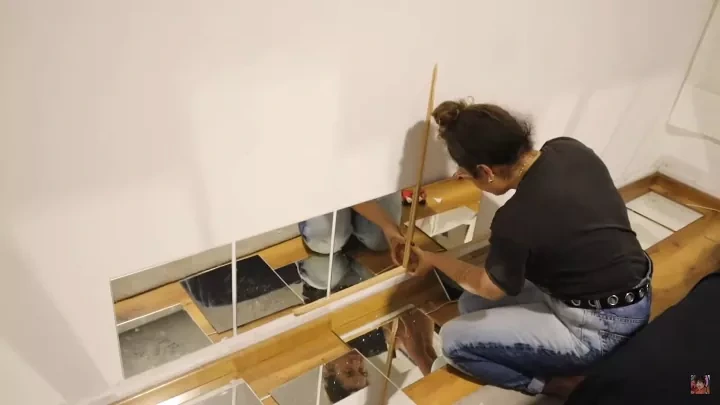
Step 1: Prepare Your Wall
Before installing mirrors, make sure the wall surface is clean and free from dust. Use a cloth or cleaning spray to wipe the wall down. This will ensure that the adhesive sticks properly. Once cleaned, use a pencil to mark the positions where each mirror will go. These marks will guide you during the installation process.
Step 2: Lay Out the Mirrors
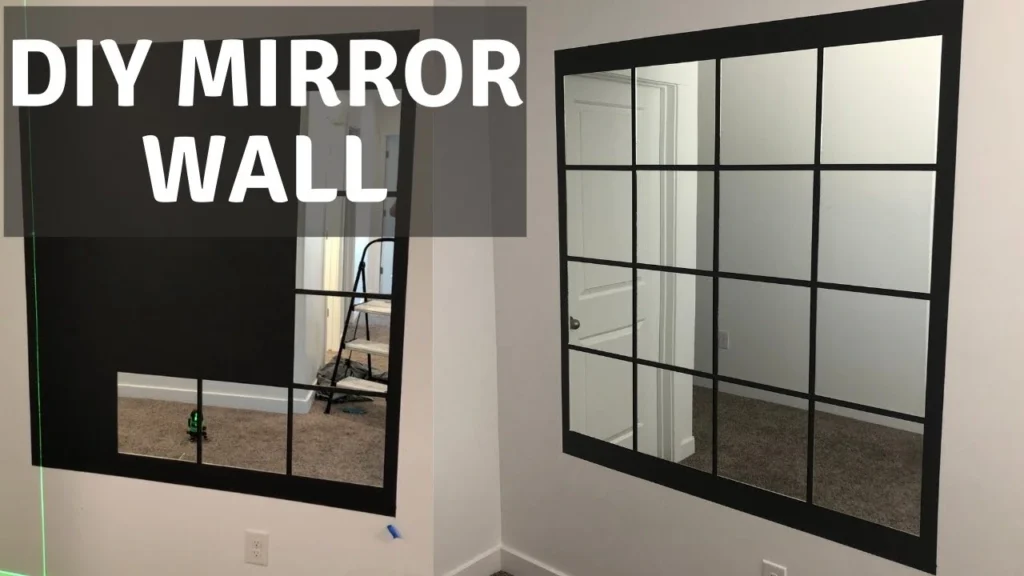
Before you start gluing the mirrors to the wall, it’s crucial to arrange them on the floor to visualize your design. Play around with different mirror wall layout options until you’re happy with the pattern. You can create a uniform grid, random scattered arrangement, or even a mirrored mosaic. Make sure to take a picture or note the layout for reference as you move forward.
Step 3: Apply Adhesive and Mount the Mirrors
After planning your layout, apply mirror adhesive to the back of each mirror. For larger mirrors, you may want to use mirror clips to secure them. Ensure the adhesive is applied evenly to prevent the mirrors from tilting or falling. Press each mirror gently against the wall, starting from the center and working outward.
Step 4: Check Alignment
As you mount each mirror, use a level to check that the mirrors are properly aligned. This ensures that your DIY mirror wall looks neat and organized. If necessary, adjust the mirrors before the adhesive sets.
Step 5: Clean the Mirrors
Once all the mirrors are mounted, take a moment to clean them. Use a glass cleaner and a soft cloth to wipe away any dust or fingerprints. A streak-free finish will make your mirror wall look professional and polished.
Styling Your DIY Mirror Wall
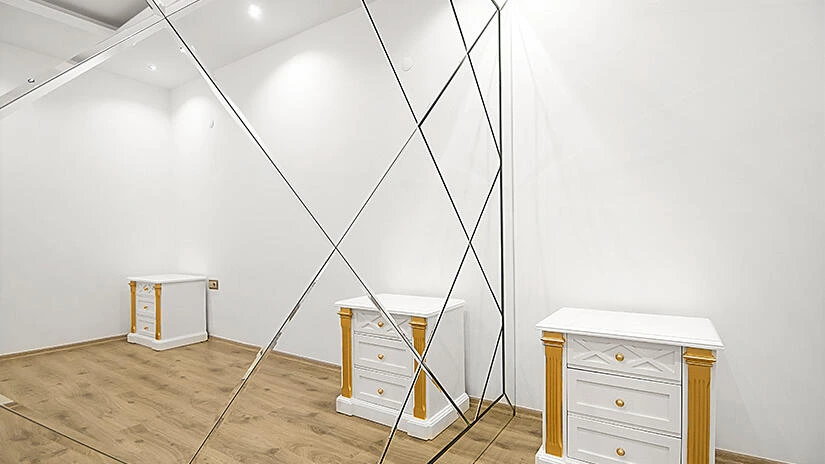
Now that your DIY mirror wall is installed, it’s time to style it! While the mirrors themselves are stunning, you can add extra flair by incorporating accessories and personal touches.
Personalizing Your Mirror Wall
Consider adding a few decorative elements around or on the mirrors to enhance the design. For example, you can frame the mirrors with wood, metal, or even fabric for a more refined look. For a more playful touch, you can add small wall decals or hanging decor that complements the mirrors.
Eco-Friendly Ideas for Your Mirror Wall
If you want an eco-friendly touch, use reclaimed wood to frame your mirrors or repurpose old mirrors from thrift stores. Eco-friendly DIY mirror wall ideas such as using vintage mirrors or creating a mosaic with broken mirrors can add a unique, sustainable twist to your design.
Advanced Mirror Wall Ideas
For those with more advanced DIY skills, you can try creating a mirrored accent wall or using mirror tiles to craft a more intricate design. Mirror tiles allow for endless possibilities in terms of patterns and configurations, creating a modern and sleek aesthetic.
Common Mistakes to Avoid
When building a DIY mirror wall, it’s essential to avoid some common mistakes that could ruin your design.
- Not measuring properly: Always double-check measurements before purchasing mirrors and applying adhesive.
- Hanging mirrors too high or low: Aim to place mirrors at eye level for maximum visual appeal.
- Using improper adhesives: Ensure that the adhesive you use is strong enough to support the weight of the mirrors.
- Ignoring wall preparation: A clean, smooth wall surface is crucial for the mirrors to stay in place.
You may like this: mirror door
Conclusion
Creating a DIY mirror wall is a rewarding and customizable home improvement project that can dramatically alter the look of your space. Whether you opt for a minimalist approach or a bold, geometric pattern, a mirror wall will bring light, space, and style to your home. By carefully planning your layout, selecting the right mirrors, and following the installation steps, you can create a stunning design that is uniquely yours. Don’t forget to add personal touches, such as custom frames or eco-friendly materials, to make the project truly special. Happy decorating!

Elena Mohr is a dedicated home blogger who has been blogging for over six years. She covers everything home related. Elena also loves writing posts about her travels to Europe with her husband and two children.

![Why Spray Foam Insulation Vaughan Homes Need: An Expert Guide [2025] Spray Foam Insulation](https://starthomeimprovement.com/wp-content/uploads/2025/09/image-150x150.png)

